Forex Risk Management 101: The Pro’s Guide to Protecting Your Capital
This is the most important lesson you will ever learn in trading. Master these non-negotiable rules for capital preservation, or the market will teach them to you the hard way.
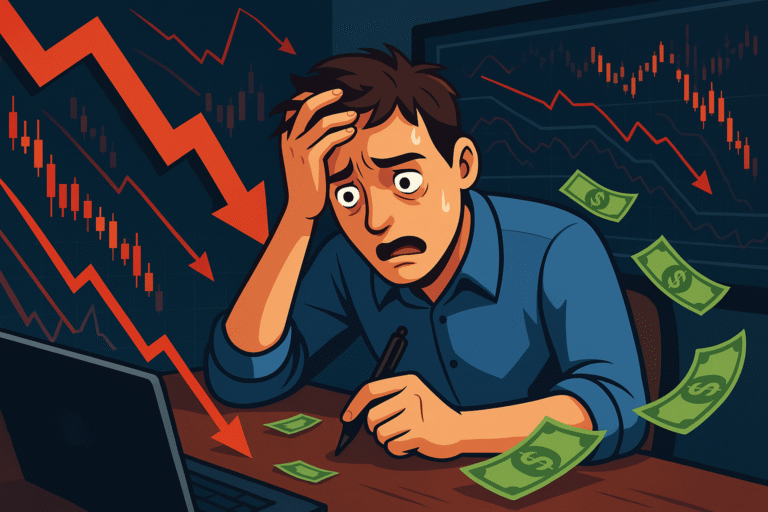
Aspiring forex traders are obsessed with one question: “How much money can I make?” They spend countless hours searching for the perfect entry strategy, the most predictive indicator, the secret to forecasting market turns. This is a fatal misallocation of focus. The question that every professional trader is obsessed with is fundamentally different: **”How much money can I lose?”**
Welcome to the most critical, least glamorous, and single most important topic in your entire trading career: risk management. This isn’t about limiting your potential; it’s about ensuring you survive long enough to realize it. Think of it this way: a brilliant pilot with a flawed pre-flight checklist is a danger to everyone. A brilliant surgeon who skips safety protocols is a menace. And a brilliant market analyst who ignores risk management is just another gambler destined to go broke. It is the single biggest reason how inexperience causes large losses in the forex market.
This guide will give you a professional-grade framework for managing risk. These are not suggestions; they are the immutable laws of capital preservation. Mastering them will be the difference between a short, painful trading hobby and a long, sustainable trading career.
The Core Principles of Forex Risk Management
- Capital Preservation is Job #1: Your first priority is not to make money, but to protect the money you have. Without capital, you cannot trade.
- The 1% Rule: Never risk more than 1% of your trading account on a single trade. This mathematical rule ensures your survival through inevitable losing streaks.
- Always Use a Stop Loss: Every trade must have a pre-defined exit point for a loss. This is your non-negotiable safety net that prevents catastrophic losses.
- Seek Positive Risk/Reward Ratios: Ensure your potential profit on a trade is significantly larger than your potential loss (e.g., 2:1 or greater). This allows you to be profitable even if you lose on more than half your trades.
- Understand Your Position Size: Your position size is your primary risk control. It must be calculated based on your stop loss and the 1% rule, not on a gut feeling.
Part 1: The Mindset Shift – You Are a Risk Manager First
Before we touch a single calculation, we must perform a crucial bit of psychological surgery. As a new trader, you are programmed to chase profits. You see a chart moving up and your brain screams, “Get in! Don’t miss out!” Your focus is entirely on the potential reward.
A professional trader has rewired their brain. They see that same chart and their first thought is, “This looks interesting. If I get in here, where must I place my stop loss? Where is my thesis proven wrong? How much would I lose if that happens? Can I afford that loss? Does the potential reward justify that risk?”
The amateur focuses on how much they can win. The professional focuses on how much they can lose, and how to control that loss.
Your trading account is your business inventory. A store owner doesn’t leave their doors unlocked at night. A restaurant owner doesn’t let ingredients spoil. They protect their inventory fanatically, because without it, they are out of business. You must adopt this same mindset. Your trading capital is your inventory. Protecting it is your primary job. The profits are simply a byproduct of excellent risk management combined with a viable trading strategy.
Part 2: The Three Pillars of Risk Management
This is the practical, “how-to” section. We will build your risk management system from the ground up, based on three unbreakable pillars.
Pillar #1: The Stop-Loss Order – Your Inescapable Duty
We’ve discussed this in our guide to common forex trading mistakes, but it is so important it must be the cornerstone of this guide. A stop-loss order is a pre-placed order with your broker to automatically liquidate your position at a specific price, thereby capping your loss.
Why It’s So Hard (And So Necessary)
Placing a stop loss is a formal admission that your trade idea might be wrong. This is an act our ego fights against. The moment a trade goes into a small loss, the emotion of “hope” kicks in. We hope it will turn around. We rationalize widening our stop loss or removing it altogether. This is financial suicide. A stop loss removes emotion and hope from the equation and replaces it with cold, hard logic.
How to Place a Stop Loss Intelligently
A stop loss should not be placed at an arbitrary dollar amount (e.g., “I’ll risk $50”). It must be placed at a logical price level on the chart that invalidates your original reason for entering the trade.
- For a Buy Trade: Place your stop loss below a recent swing low or a key technical support level. If the price breaks below this level, the bullish structure is broken, and you want to be out.
- For a Sell Trade: Place your stop loss above a recent swing high or a key technical resistance level. If the price breaks above this level, the bearish structure is broken.
Pillar #2: Position Sizing & The 1% Rule – Your Survival Formula
This is where the rubber meets the road. Position sizing is the single most effective tool you have for controlling your risk, yet it’s the most overlooked by beginners.
The 1% Rule is simple: You will never, ever risk more than 1% of your total account equity on a single trade. If you have a $10,000 account, the maximum you can lose on one trade is $100. If you have a $500 account, the max risk is $5.
This rule is your mathematical shield. It ensures that you would have to lose 100 trades in a row to blow up your account. It gives you incredible staying power, allowing you to survive the inevitable strings of losses that every trading system experiences. So, how do we apply it?
The Position Size Calculation: A Step-by-Step Example
Your position size is not a guess. It is a calculation. Here is the formula and a real-world example.
Scenario:
- Account Size: $5,000 USD
- Risk Percentage: 1%
- Currency Pair: EUR/USD
- Entry Price (Buy): 1.0750
- Stop Loss Price: 1.0700 (placed below a support level)
Step 1: Determine Your Risk in Dollars
Account Size * Risk % = Max Risk
$5,000 * 0.01 = $50
On this trade, the absolute most you can lose is $50.
Step 2: Determine Your Stop Loss Distance in Pips
Entry Price – Stop Loss Price = Stop Distance
1.0750 – 1.0700 = 0.0050 or 50 pips
Step 3: Determine the Pip Value
The value of a pip changes depending on the currency pair and your position size. For the EUR/USD, the values are roughly:
- 1 Standard Lot (100,000 units) = $10 per pip
- 1 Mini Lot (10,000 units) = $1 per pip
- 1 Micro Lot (1,000 units) = $0.10 per pip
Step 4: Calculate the Position Size
Position Size = (Max Risk in $) / (Stop Distance in Pips * Pip Value)
To find the correct unit size, we use a simple formula: (Risk in $) / (Stop in Pips) = Value per Pip
$50 / 50 pips = $1 per pip
Which lot size has a pip value of $1? A mini lot. Therefore, your correct position size for this trade is **1 mini lot (or 10,000 units).**
If you take this position size and the trade hits your 50-pip stop loss, you will lose 50 pips * $1/pip = $50, which is exactly your pre-defined 1% risk. You are in complete control. Mastering this calculation is a core component of our forex trading for beginners curriculum.

The Definitive Guide to Position Sizing
“Trade Your Way to Financial Freedom” by Van K. Tharp is considered the bible of risk management and position sizing. Tharp, a legendary trading coach, argues convincingly that your “system” for how much you bet (position size) is far more important than your entry signals. This book provides the mathematical and psychological framework for professional risk control.
View on AmazonPillar #3: The Risk/Reward Ratio – Making Your Wins Matter
The final pillar is ensuring that your winning trades are powerful enough to overcome your losing trades. The Risk/Reward Ratio (R:R) compares the amount of money you risk on a trade to the amount of potential profit you aim to make.
In our example above, we risked 50 pips. If our profit target was also 50 pips away, our R:R would be 1:1. But what if our profit target was 100 pips away?
- Risk: 50 pips
- Potential Reward: 100 pips
- Risk/Reward Ratio: 1:2
Why a Positive R:R is Your Secret Weapon
Let’s look at the math with two traders over 10 trades, each risking $100 per trade.
Trader A (1:1 R:R): Wins 6 trades (60%), loses 4 trades (40%).
Profit: 6 * $100 = $600. Losses: 4 * $100 = $400. Net Profit: $200.
Trader B (1:2 R:R): Only wins 4 trades (40%), loses 6 trades (60%).
Profit: 4 * $200 = $800. Losses: 6 * $100 = $600. Net Profit: $200.
Look at that! Trader B was wrong more often than they were right, but because their winners were twice as big as their losers, they made the same amount of money. By only taking trades that offer a minimum of a 1:2 Risk/Reward ratio, you build a powerful mathematical edge into your trading. You don’t have to be perfect to be profitable.
Part 3: Advanced Concepts for Your Toolkit
Once you have mastered the three pillars, you can begin to integrate more nuanced risk concepts into your approach.
Leverage is an Output, Not an Input
Beginners see “50:1 leverage” and think they should use it. Professionals ignore it. The amount of leverage you use should be a *result* of your position sizing calculation. You don’t decide to use high leverage; you decide to risk 1%, and the leverage your position requires is simply what it is. The mechanics of leverage are explained in our guide on how forex trading works, but the philosophy of its use belongs here.
Correlation Risk
Currencies often move in tandem. The EUR/USD and GBP/USD, for example, are highly correlated because both are weighed against the US Dollar and their economies are linked. If you take a buy trade on both pairs simultaneously, you haven’t taken two 1% risk trades. You have likely taken a single, concentrated 2% risk trade on the direction of the US Dollar. Be aware of these correlations to avoid unknowingly doubling or tripling your risk on a single theme.
Conclusion: Risk Management is the True “Holy Grail”
Every aspiring trader is looking for a secret, a “holy grail” that guarantees profits. Here it is: **The Holy Grail is boring. It’s math. It’s discipline. It is a fanatical, unwavering commitment to the principles of risk management.** It’s the conviction to walk away from a tempting trade setup because the risk/reward isn’t good enough. It’s the humility to take a small loss when you’re wrong without letting it damage your psyche or your account.
If you internalize the lessons in this guide—if you make the 1% rule, the mandatory stop loss, and positive R:R the bedrock of your trading—you will already be ahead of 90% of retail traders. You will have built the foundation for a long and successful career in the world’s most competitive marketplace, which you can learn more about in our guide to what the forex market is.
Frequently Asked Questions on Risk Management
What is a good risk-to-reward ratio for a beginner?
A beginner should never take a trade with a risk-to-reward ratio of less than 1:2. This means for every $1 you risk, you should have a realistic potential to make $2. This builds a strong mathematical edge and good habits from the start.
How do I calculate my risk per trade in forex?
First, decide on a risk percentage (e.g., 1%). Second, calculate that percentage in dollars based on your account size (1% of $10,000 is $100). Third, determine your stop loss distance in pips. Finally, adjust your position size so that if your stop loss is hit, you only lose your pre-determined dollar amount ($100 in this example).
Is it ever okay to trade without a stop loss?
For 99.9% of retail traders, the answer is an unequivocal **NO**. There are extremely complex, multi-legged institutional strategies that may not use simple stop losses, but they use other advanced hedging methods. For a retail trader using a standard platform, trading without a stop loss is pure negligence.
Should I move my stop loss to break-even?
Moving your stop loss to your entry price (“break-even”) once a trade is in significant profit is a common trade management technique. It’s a good way to turn a “risk-on” trade into a “risk-free” trade. However, be careful not to do it too soon, as normal market volatility can stop you out for no loss before the real move begins.